I got the measurements and she bought the fabric, so all I had to do was figure out how it fits together. I've made a few purses before, so I figured the construction would be similar--make a lining, make the outside part, and stitch them together somehow.
Here is the inside:
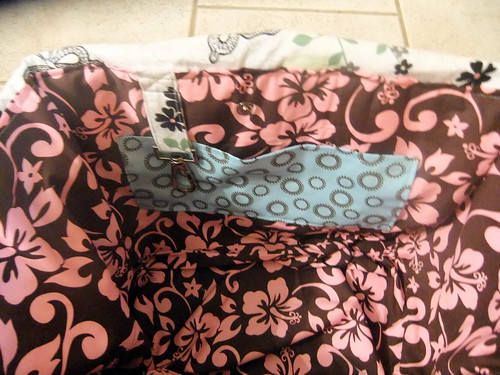
I made a basic lining but added pockets to both sides. I also made some bias tape and stitched with an "x" to keep that key loop in place. I figured it would get pulled on a lot, so I wanted to make sure that it was secure. As you can see, I placed the key loop close to the pocket so your keys would fit nicely in the pocket.
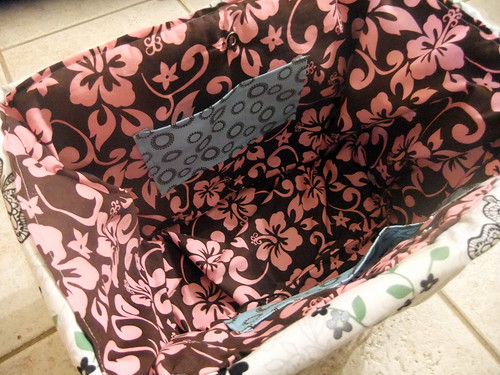
The other side:
I didn't use a pattern, just made it up as I went along.
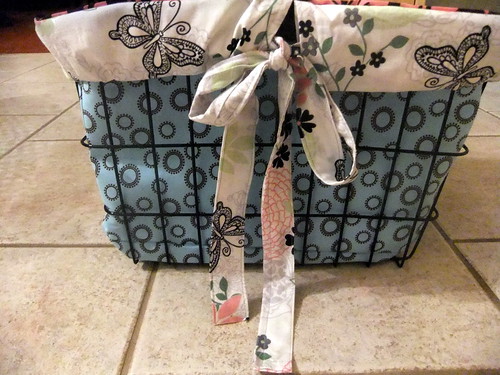
For the outside sashing, I originally thought that I would just sew it down. Then I realized that it has a function if you make the "bow" tighten the grip on the basket. So I made a big loop, stitched on edge between the lining and the outside, and folded over. Then I threaded through the "ribbon" that I had made. I should mention I did all of this PRIOR to actually seeing the basket in person. I think it turned out ok. I was really relieved that it fit, and very happy that the bow was found to have a functional purpose!
That truly is quilty goodness....what a wonderful job you did and the little doggie will be so comfy.
ReplyDelete